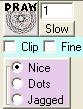
To draw a design, simply press the Draw button. It stands in the center of things, since it is the most used button. It reads all of the settings and draws a design according to them. It will usually not let you do the same design twice, since that tends to confuse things. There are exceptions. But this was mainly to stop a common mistake, where someone pressed the Draw several times in a row without changing anything.
There is a Slow button. When this is pressed, the design is drawn much slower (roughly 25 seconds) in a preview mode so you can see what it will be. You may like this because it gives the same sensation one had as a child when using the original toy, and one was anticipating what may happen.
Not all settings are able to produce a design. If the design is impossible to draw, you will see a message in the status line. In addition to that, some designs are partly drawn or partly visible. The partly drawn ones are cases where only part of the design would appear on the paper. This would be the same as if on the original toy, a design was drawn until one could not do it; one lifted the arms up and placed them back down when the design became possible again. The toy instructions specifically tell you not to do this, since it may damage the mechanism.
Clip is checked (default is unchecked) to make sure that the design appears inside the paper (circle or ellipse). This is more true the real toy, since we only want to draw on the paper, and not dirty up the toy or jam the pen somewhere. But most of the time, when a design violates this boundary it is nice. This is especially true when playing with Advanced tab parameters.
Fine is checked means to sample the design 360 times rather than 120 times per rotation of the crank. This is rarely needed. If you see the curve to have some flattening edit it with fine checked to see if that improves it.
The number field next to Draw is the most powerful new feature of the new version. It will make that many designs when you press Draw. It starts with settings at the selected design (either the one last drawn or one reached by navigation). And morphs to the settings. Most of the possible settings can be morphed. If one of others (such as Fine or Clip) are different between selected design and current settings, it will not draw. The two most likely changes to be made are morphing between ellipses, such as a zoomed one, and selecting a range in the shift lever. It starts at some delta after the selected design. An example would be draw CC10 and change the shift lever to 30 and enter the number 10 and press Draw. It will draw CC:12, 14, 16, 18, 20, 22, 24, 26, 28, 30. It is also important to know that if one entered 11, that the designs would still get drawn, but they would be drawn in fractional degrees. These designs cannot be expressed using the Basic tab, so they would show 00 in the Shift lever when navigating or editing.
There are three ways designs can look on the paper. The standard way is called Nice. It is a smooth curve using anti-aliasing technology like in PDF files. Dots shows a dot at each sample point. Dots gives a similar feeling as Slow, since it shows the speed of how the curve was drawn. Using dots with larger Stroke shows little squares. Jagged is a jagged curve using no anti-aliasing. This has the same appearance as the old version of this program, even though the underlying technique is different. Its main purpose is to be used for designs to be exported to Paint programs where one colors in the areas between designs. Anti-aliased designs leave color residues.
There are two differences between the Edit and Undo buttons. One is that Edit changes the design settings and Undo does not. If you do not like the design you can press either one. If you really change your mind again, you can press Draw after Edit, or press Redo after Undo.
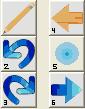
The buttons under the pencil are Undo and Redo. Each time you Undo a design, it is added to the Undo stack. And when you press Redo, it takes the design off the top of the stack and draws it. These buttons, combined with the following buttons I will discuss, form a completely functional editing package. The one thing lacking is the ability to change the same thing about several designs at once. The number next to Draw is also used by Undo and Redo.
The design suite or session should be seen as list, which you can move from one end of to the other. Sometimes the order that designs are drawn is important, and most times it is not. To navigate the designs you can press the Previous and Next buttons (backwards arrow is previous). The purpose of the current button (blue circle) is to make sure you know what design is selected. The concept of selecting a design is very useful if you want to Edit or Undo that one. Also, any designs drawn from the Draw or Redo buttons is placed after the selected design and before the following design in this list. This may or may not be useful. If you get confused about the order, press Previous (or Next) repeatedly. The Previous will cycle to the last design after the first, and the Next will cycle to the first design after the last. The way these navigation buttons work, is that you press and hold the button down for as long as you want to see the design. The design is the only design seen, and the entire design session is restored when releasing the button using the mouse.
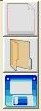
The copy to clipboard button is the same as an Edit menu's Copy operation. But what it does is take a snapshot of the drawing area and place it in the clipboard. The purpose is so that it can then be pasted into any graphics viewer or painting program. These programs have many of the image manipulation and printing functions lacking in Magic Designer. The ellipse used to define the current design is not copied, so it copies clean.
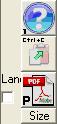
The PDF button is another form of copy. It will bring up a file dialog to ask where to save this PDF file. Then the program will create the file and launch the PDF viewer showing this PDF. Depending on system load and design session complexity, this can take a few seconds, so please be patient. The PDF is scaled to the current size of the rectangular paper drawing area. There is a Landscape check box. This will write the PDF in landscape mode. This makes better use of the PDF in most cases, since most of the time the drawing area will be wide screen, and the PDF is like paper in print out. One can print the PDF using the PDF viewer, or dynamically scale the designs. This is the main advantage of a PDF over a Paint program.
The Size button
shows the x,y pixel extents of the paper drawing area, and the design
session. This is most useful since designs can be drawn off paper. They
are not actually drawn because of the operating system. But they are
known internally. So if it shows designs off paper, one can resize
the drawing area to possibly see these designs.